Mastering the Exposure Triangle: A Quick Beginner’s Guide
Ever take a photo that looked nothing like what you saw with your eyes — too dark, too bright, or mysteriously blurry? That’s exposure at work. And the best way to get control over exposure is by learning the exposure triangle.
The good news? It’s not nearly as scary as it sounds. Once you understand how the three sides — aperture, shutter speed, and ISO — work together, you’ll be able to take creative control of your photography instead of letting “Auto” decide for you.
What Is the Exposure Triangle?
Think of the exposure triangle as a balancing act. Each side controls how much light reaches your camera’s sensor, and adjusting one side usually means adjusting another.
Aperture: The Window to Light
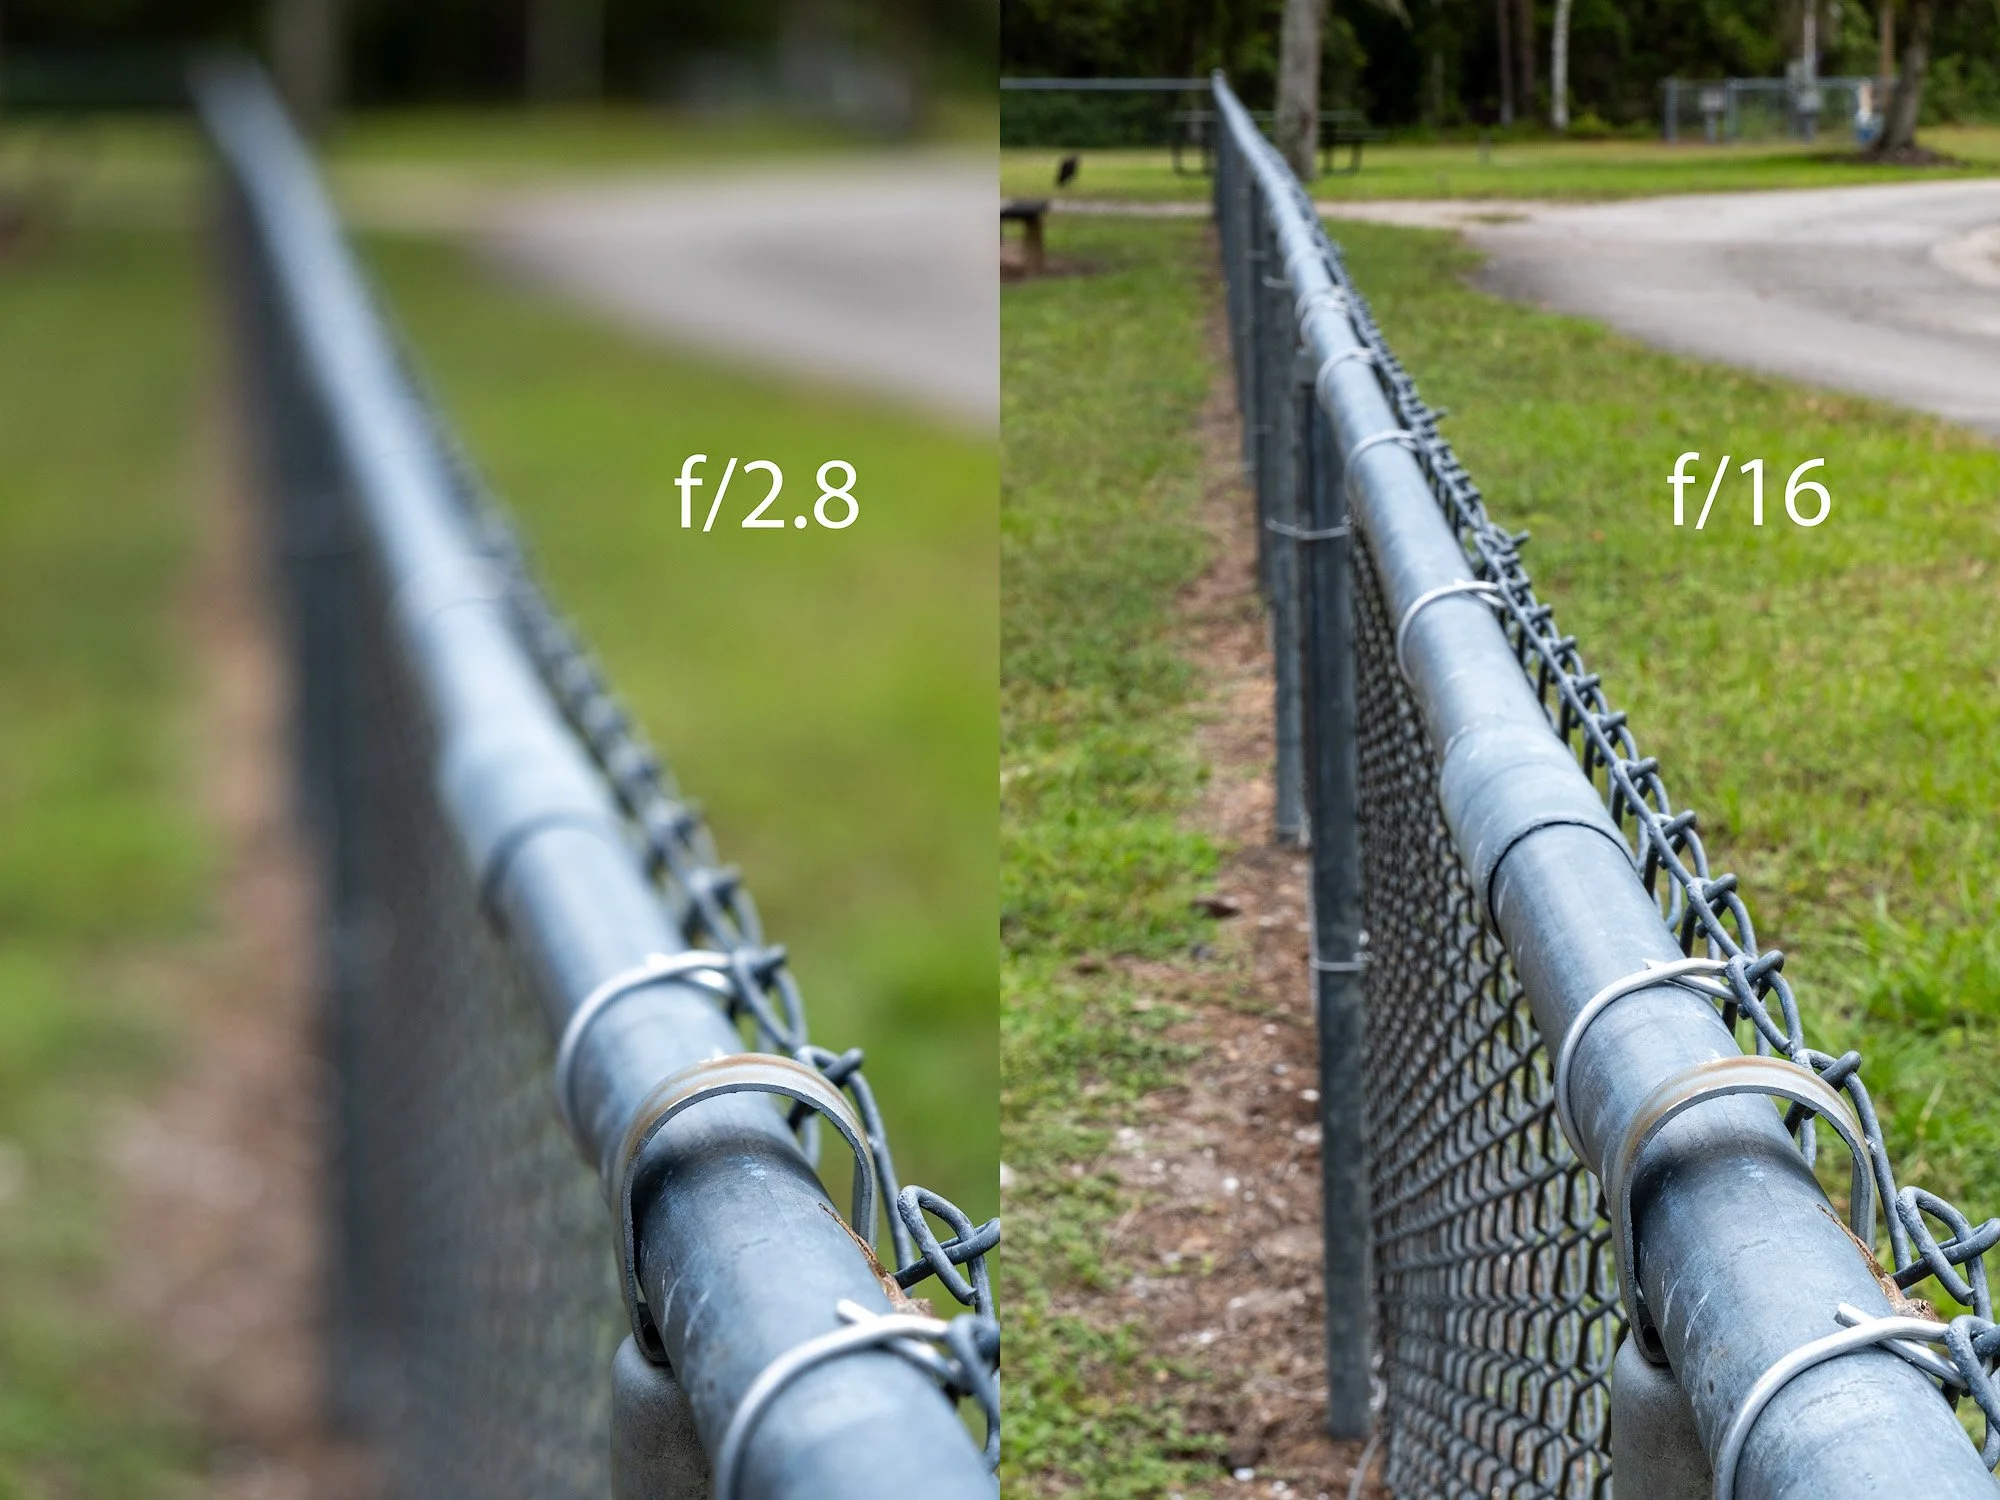
Aperture is the adjustable opening in your lens, measured in f-stops like f/2.8 or f/16.
Wide aperture (small number, like f/2.8): Lets in lots of light and creates beautiful blurry backgrounds. Perfect for portraits.
Narrow aperture (big number, like f/16): Lets in less light but keeps the whole scene sharp. Great for landscapes.
Bonus Tip (From My Experience): For general everyday photography, I’ve found these “sweet spot” apertures often work best:
Full frame: f/8 or f/9
APS-C: f/6.3 or f/7.1
Micro Four Thirds: f/5.6
Medium format: f/11
This isn’t a hard rule — just what I’ve found consistently delivers sharp, reliable results across different systems.
Caveat: Every lens behaves differently. Stop down too far and you risk diffraction, which softens detail. Open up too wide and you may see vignetting (dark corners) or reduced edge sharpness. The best way to find your lens’s sweet spot is to experiment at different apertures and compare the results.
Shutter Speed: Freezing or Blurring Motion
Shutter speed is how long your camera’s “curtain” stays open to let light in. In older cameras this was a physical shutter, while some newer cameras now use an electronic shutter. Either way, the idea is the same: it’s the length of time your sensor gathers light.
Fast shutter (1/1000, 1/2000): Freezes motion. Great for sports, wildlife, or energetic kids.
Slow shutter (1/30, 1", 10"): Lets in more light and shows motion blur. Perfect for waterfalls, light trails, or night photography with a tripod.


Bonus Tip: A good guideline is to keep your shutter speed at least 1/focal length of your lens. For example, with a 50mm lens, aim for 1/50 second or faster. Even with modern image stabilization, this is a solid practice for avoiding motion blur in handheld shots.
Caveat: Image stabilization can help you hold the camera steady at slower speeds, but it won’t freeze a moving subject. If your subject is moving, you’ll still need a fast enough shutter to keep them sharp.
ISO: Your Camera’s Sensitivity
ISO controls how sensitive your camera’s sensor is to light.
Low ISO (100–200): Crisp, clean images. Best in bright conditions.
High ISO (1600+): Useful in low light but can add visible grain (noise). Handy for concerts, indoor sports, or handheld night shots.

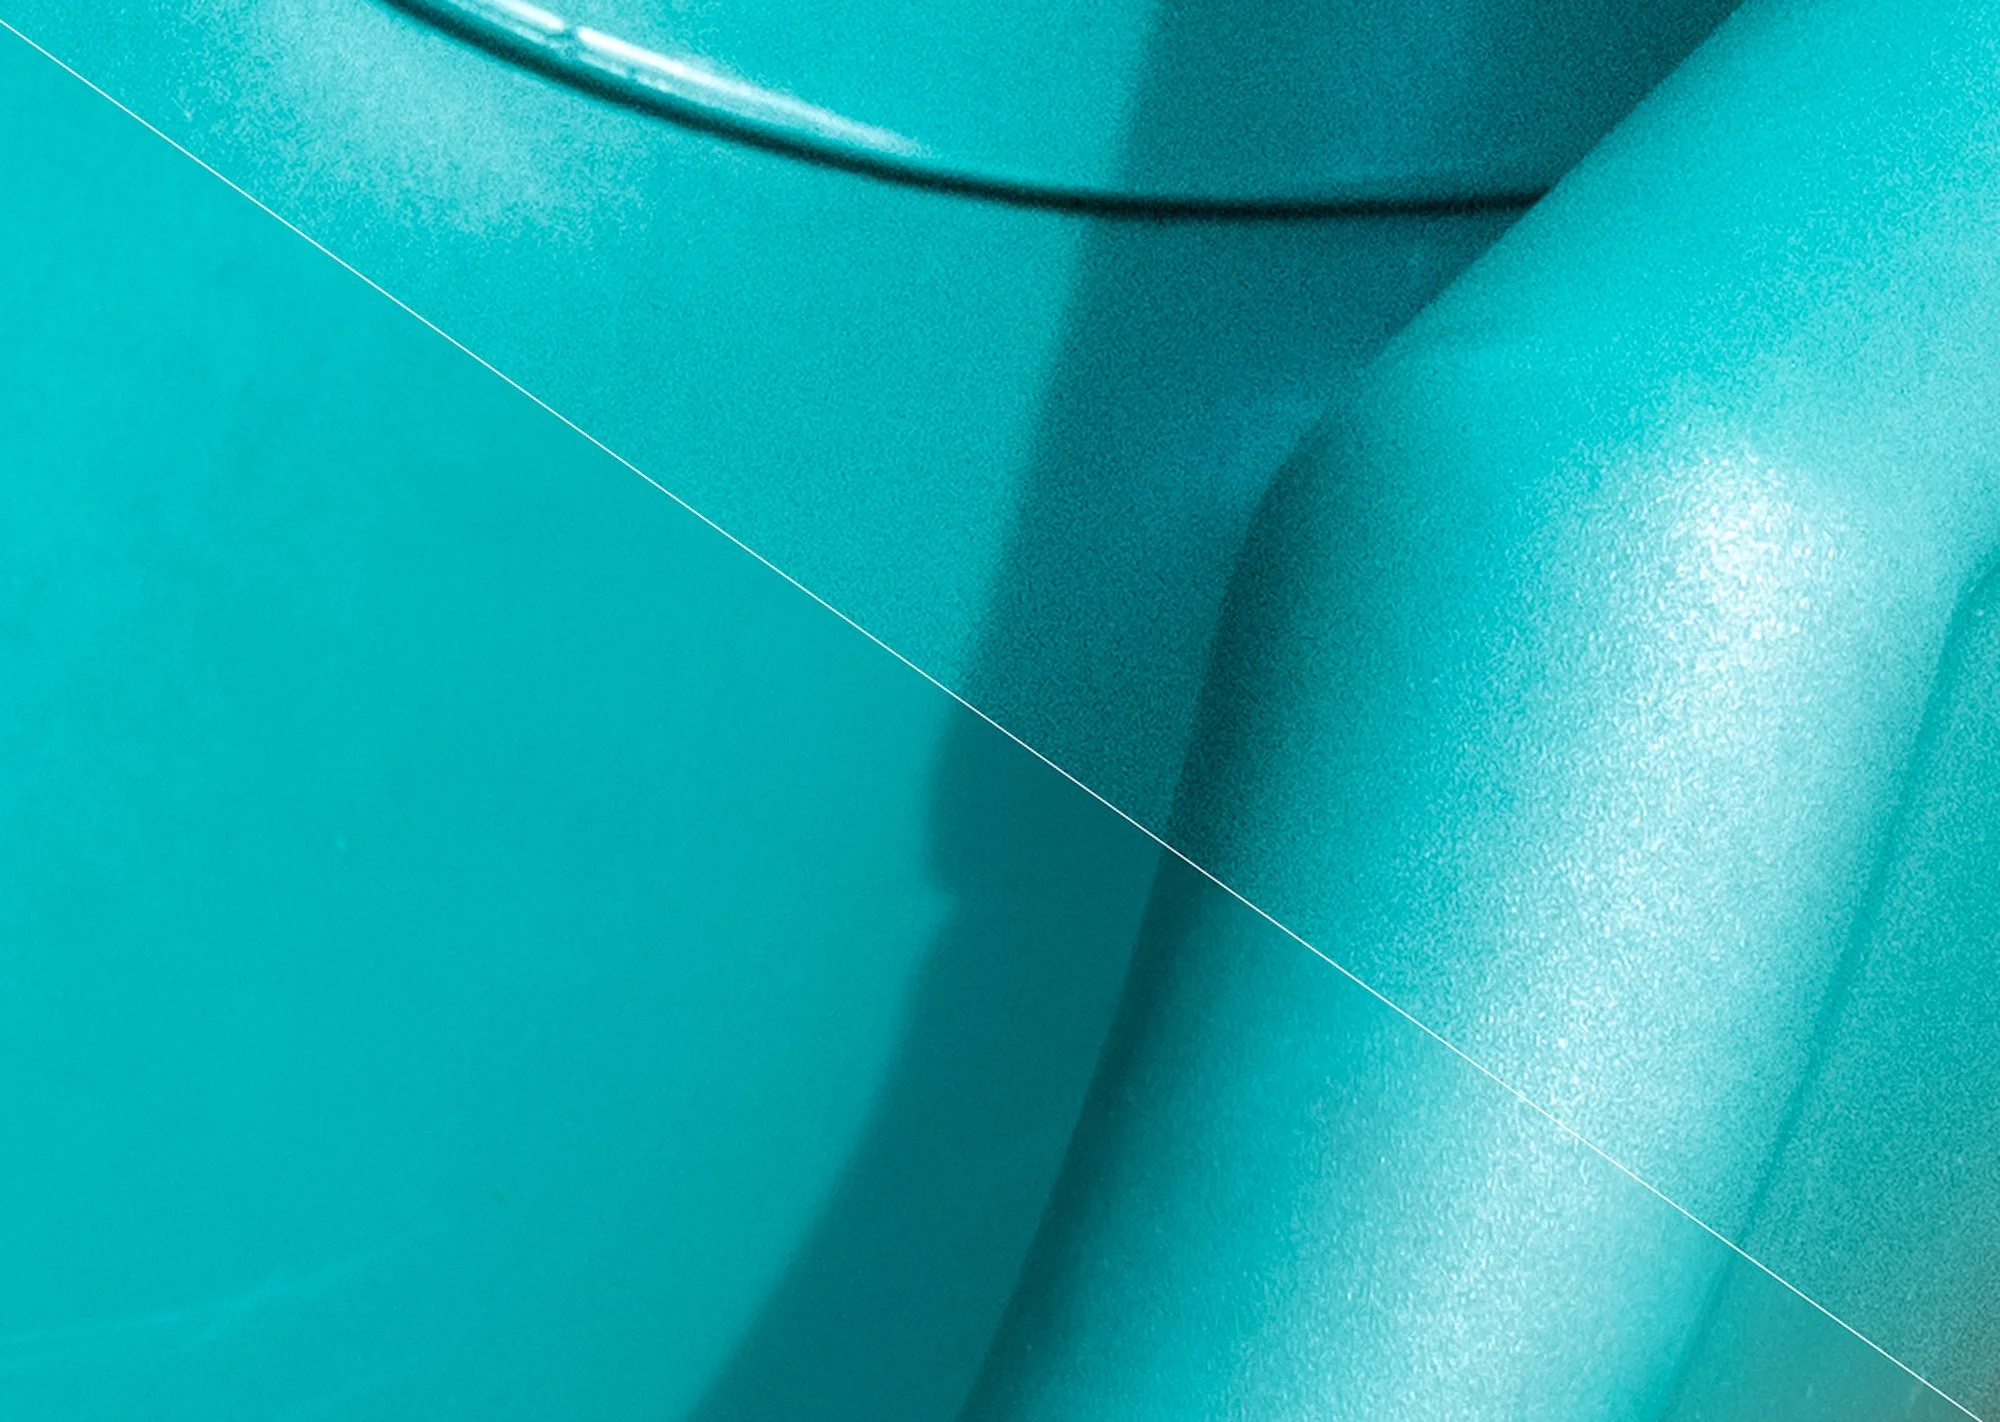
Bonus Tip: Don’t be afraid to push your ISO. Modern cameras handle noise incredibly well, and noise reduction software can clean things up beautifully. I wouldn’t hesitate to use ISO 800 (or higher if needed) on any current camera. Sometimes, raising ISO is the best way to get the shot you want. Even in the example above, shot with a Fuji X-T5, the ISO 1600 image was more than acceptable and could easily be cleaned up to reduce the noise.
Caveat: The trade-off with higher ISO isn’t just noise — it’s also reduced dynamic range. Shadows and highlights can lose detail more quickly as ISO climbs. Test your camera to learn its “comfortable range” so you know how far you can push it before image quality suffers in ways noise reduction can’t fix.
Bonus Tip: #2 Watch out for the photography gatekeepers! ISO is much more complex than what is widely talked about and some get very passionate telling you it's not about light sensitivity. For beginners, thinking of it in terms of light sensitivity is extremely helpful, so don't be afraid to think of it this way.
How the Triangle Works Together
Here’s the trick: the exposure triangle is about trade-offs.
Open the aperture for more light → you may need a faster shutter.
Slow the shutter for motion blur → you might need to lower ISO to prevent too much brightness.
Raise ISO in a dark room → you can keep shutter fast enough to avoid blur.
Analogy: Imagine filling a glass with water.
Aperture = the size of the faucet
Shutter speed = how long the faucet runs
ISO = how much water pressure you add
All three can fill the glass, just in different ways.
Practical Examples
Portrait on a Sunny Day: f/2.8, 1/1000, ISO 100 → Dreamy background blur, tack-sharp subject.
Waterfall with Motion Blur: f/11, 1/2 sec, ISO 200 → Silky smooth water effect (tripod needed).
Indoor Sports: f/2.8, 1/500, ISO 3200 → Crisp action, acceptable grain in low light.
Remember: creative choice dictates priority.
Want background blur? Start with aperture.
Want to freeze motion? Start with shutter speed.
Want the cleanest image quality? Keep ISO as low as possible.
As long as your settings serve your creative vision, there’s no wrong answer — only different looks.
Try This at Home: A Quick Exercise
Pick one subject (like a coffee mug on a table) and shoot three versions:
Wide aperture, fast shutter, low ISO.
Narrow aperture, slower shutter, higher ISO.
A balanced “middle ground.”
Lay them side by side, and you’ll instantly see how each setting shapes the image.
Final Thoughts
The exposure triangle is the foundation of photography. Once you learn to balance aperture, shutter speed, and ISO, you’ll unlock endless creative control. Whether you want dreamy portraits, frozen action, or moody night scenes, the power is in your hands.
So grab your camera, switch out of Auto, and start experimenting. Your best photos are waiting.