Setting Up Lightroom: Catalogs, Imports, and Workflow Basics
(Foundational Tutorial Series — Lesson 2)
This lesson is a practical, step-by-step setup for Lightroom Classic.
We won’t cover every button—just what you need to get organized, import your RAW files cleanly, and build a foundation you can expand on later.
Phase 1 — One-Time Setup
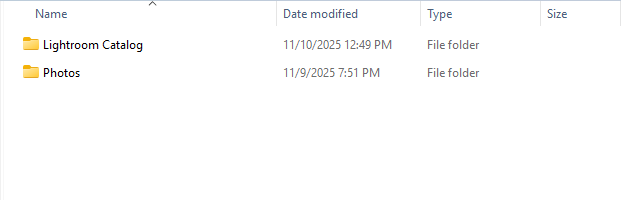
Step A1 — Create Folders on Your Drive
Use Finder or File Explorer and create the following structure:
Inside Photos, add a current-year folder, or multiple folders if applicable:
Note: folder don't have to be labeled by year. Years were used as an example for this post.
Step A2 — Create a New Lightroom Catalog
Open Lightroom Classic and go to File → New Catalog…
Save inside your Lightroom Catalog folder.
Give your catalog a name (I'll use Photo_Odyssey_Main) and click Create.
Lightroom will restart with a blank catalog.
Step A3 — Set Helpful Preferences
Mac: Lightroom Classic → Settings → Preferences…
Windows: Edit → Preferences…In the General tab, check Treat JPEG files next to RAW files as separate photos (optional).
In the Performance tab, locate Camera Raw Cache Settings and set the cache size to 20–50 GB for smoother performance.
In the Presets tab, check Store Presets with This Catalog (optional).
Click OK to save and close the Preferences window.
Phase 2 — Your First Import
Step B1 — Open the Import Window
In the Library module, click Import at the bottom left.
You’ll see panels for Source (left), thumbnails (center), and Settings (right).
Step B2 — Choose Source
Select the root directory of your photos. In my case it will be D:Photo Odyssey/Photos (see screenshot above)
Or select your camera card if using real images.
Thumbnails should appear in the main grid.
Uncheck any images you don’t want to bring in.
Step B3 — Select Import Method (Top Center)
Copy as DNG: Converts files to DNG format.
Copy: Copies RAW files as-is from your card (recommended).
Add: Keeps files in place (use if they’re already in your final folder).
For this example, use Add for your test folder or Copy if importing from an SD card.
Step B4 — Right Panel Settings
File Handling
Build Previews: Standard
Build Smart Previews: Optional
Don’t Import Suspected Duplicates: Checked
Make a Second Copy To: Optional backup drive
File Renaming (skip if using Add)
Check Rename Files and use the template
Date-Custom Name-Sequence.Add a custom text description such as Test Import.
Apply During Import
Develop Settings: Select your base preset (if you have one).
Metadata: Choose or create a new preset with copyright info.
Example: Copyright © 2025 Dan Garner, photo-odyssey.com
Keywords: Add relevant words like test, workflow, tutorial.
Destination (only visible when using Copy)
Into Subfolder: Checked
Subfolder Name: (current date)_Test_Import
Organize: Into one folder
Parent Folder:
Photos/2025
Click Import when finished.
After import, your photos should appear in the Library grid under
Folders → Photos/2025
Phase 3 — Culling & Organization
Step C1 — Confirm Folder Structure
Check the Folders panel on the left. It should look like this:
Step C2 — View Shortcuts
G = Grid view
E = Loupe view
C = Compare view
N = Survey view
Tab = Hide or show side panels
Step C3 — Flags & Ratings
Action Shortcut Purpose Flag Pick P Keep it Reject X Discard Unflag U Clear flag Star Ratings 1–5 Quality rating Color Labels 6–9 Optional sorting
Suggested system:
P = Keeper
X = Reject
3★ = Solid
5★ = Edit-worthy favorite
Step C4 — Filter Your Keepers
Press \ (backslash) to show the Filter Bar.
Click the Attribute tab.
Filter by Flagged or ≥3 Stars to show only your selected images.
Step C5 — Create a Collection (Optional)
In the Collections panel, click the + icon.
Choose Create Collection…
Name it something like 2025-10-29 Test Selects.
Check Include selected photos and click Create.
Collections let you group photos without moving them on your drive.
Step C6 — Backup Now
Catalog Backup
Windows: Edit → Preferences → Backups
Mac: Lightroom Classic → Settings → Preferences → Backups
Set Back Up Catalog to Every time Lightroom exits (or Weekly).
Choose a backup folder on a different drive.
Check Test integrity before backing up (optional).
This backs up your catalog file (.lrcat) — not your photos.
Photo Backup
Copy your entire
Photos/folder to a second external drive or a cloud backup service.Follow the 3–2–1 rule: 3 copies, 2 media types, 1 off-site.
Phase 4 — Wrap Up
You’ve now:
Built a working Lightroom catalog
Imported photos properly
Flagged and rated your images
Created a collection
Enabled automatic backups
This forms the backbone of an organized, efficient workflow. You’re now ready to start editing with confidence.
Coming Up Next
Lesson 3: Global Adjustments — a plain-English look at exposure, contrast, highlights, shadows, whites, blacks, and presence, explaining what each slider does and when to use it.